How to Make a Halloween Wreath - 2017
Two words: Michael's and coupons.
It should be no surprise to you that I am a couponer and I highly suggest waiting to acquire your wreath and supplies when you have a coupon and there's a sale at Michael's or Hobby Lobby (or your local craft store)! I may not be making anew wreath this year (TBD) so figured I could share one of my early posts from right after I started my blog about making a Halloween wreath. I do have intentions of making new seasonal crafts, but the month of October is supposed to be focused on blog improvements this year. =)
Making a wreath is pretty darn easy and fun as I recently shared for a fall wreath that will last the entire harvest season throughout Thanksgiving.

Shopping List:
- floral wire
- wire cutters
- hot glue gun
- hot glue sticks
- grapevine wreath, or other wreath desired
- Halloween ribbon - per preference
- faux leaf stems
- faux pumpkin, ghosts, ghouls, etc. stems
- faux florals in Halloween colors
- a premade bow if desired
The how-to part of making the wreath is easy and will mimic my previous post almost identically. Make sure you have floral wire, wire cutters, scissors, and a hot glue gun!
I laid out the items to use and assesses which side of the wreath was the top. Then I wrapped the black burlap ribbon around the wreath leaving parts of the wreath exposed. You need area exposed so that you can shove the floral stems and decor into the wreath. There is no right or wrong on this and I sort of like the wreath not to be too perfectly symmetrical. I don't know why. Once you have the ribbon on there you can either tuck it into the wreath or use a clothes pin to temporarily secure it. You will hot glue it later, but for now it's best to wait in case you need to make an adjustment.
Next I started trimming and cutting off pieces of the Halloween floral stems as I worked and plugged them into the wreath's vines. Work your way around the wreath in sections. I finish one section at a time. As the wreath fills out you'll be able to make adjustments if one area seems more full than another.
When you're finished filling in the wreath and making adjustments, you can attempt to make a bow. I say attempt because that's all I can do. I tied a basic bow, pulled floral wire through the base of the bow to secure it to the wreath, then used a lot of hot glue to slowly and carefully attach the bow to the wreath permanently.
This is after wiping up what looked like pounds of glitter...
Once that is completed, you can begin to carefully secure the floral stems and decor attachments. I worked one section at a time, lifting up the items a tiny bit to get the hot glue gun underneath it, and carefully coat the stems to the wreath. Take your time doing this, it's not a race and you want it to be secure AND look good, not have hot glue showing everywhere!
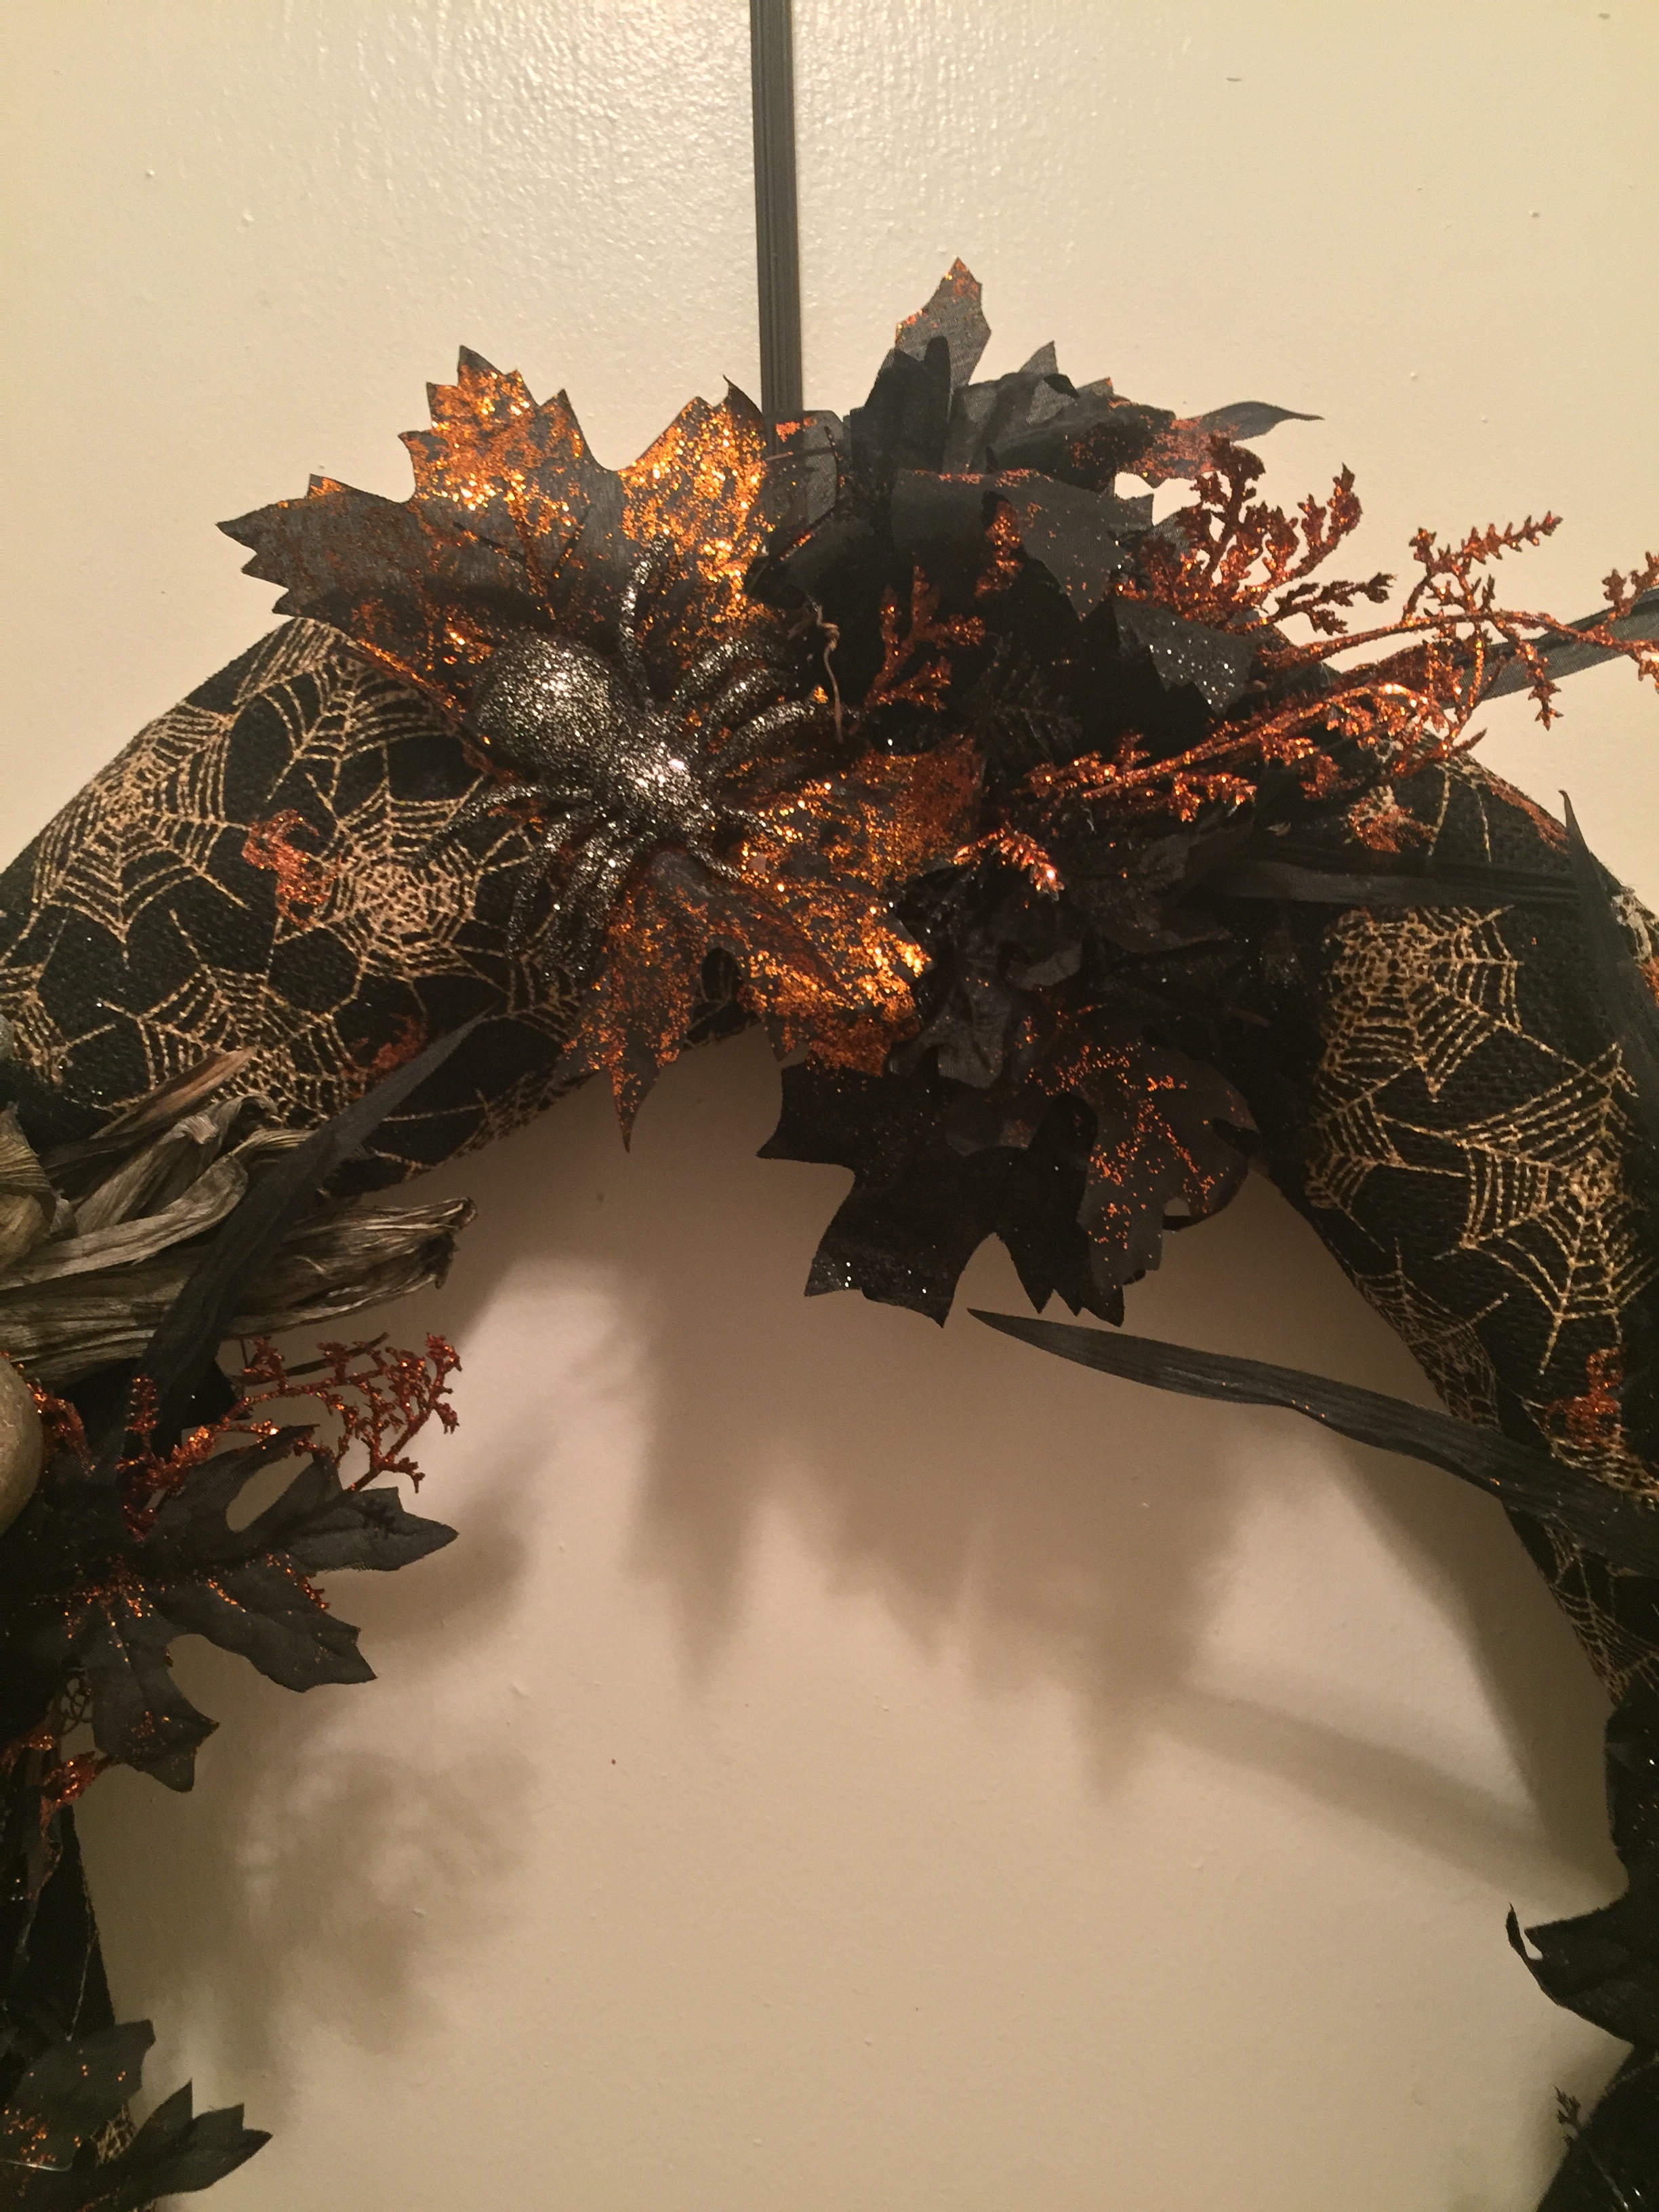
The coloring may vary slightly in the images below because I've had to lighten some more than others so you can see the details of the black leaves etc. With so much black on black it is hard to tell what is on there so I also took pictures up close.
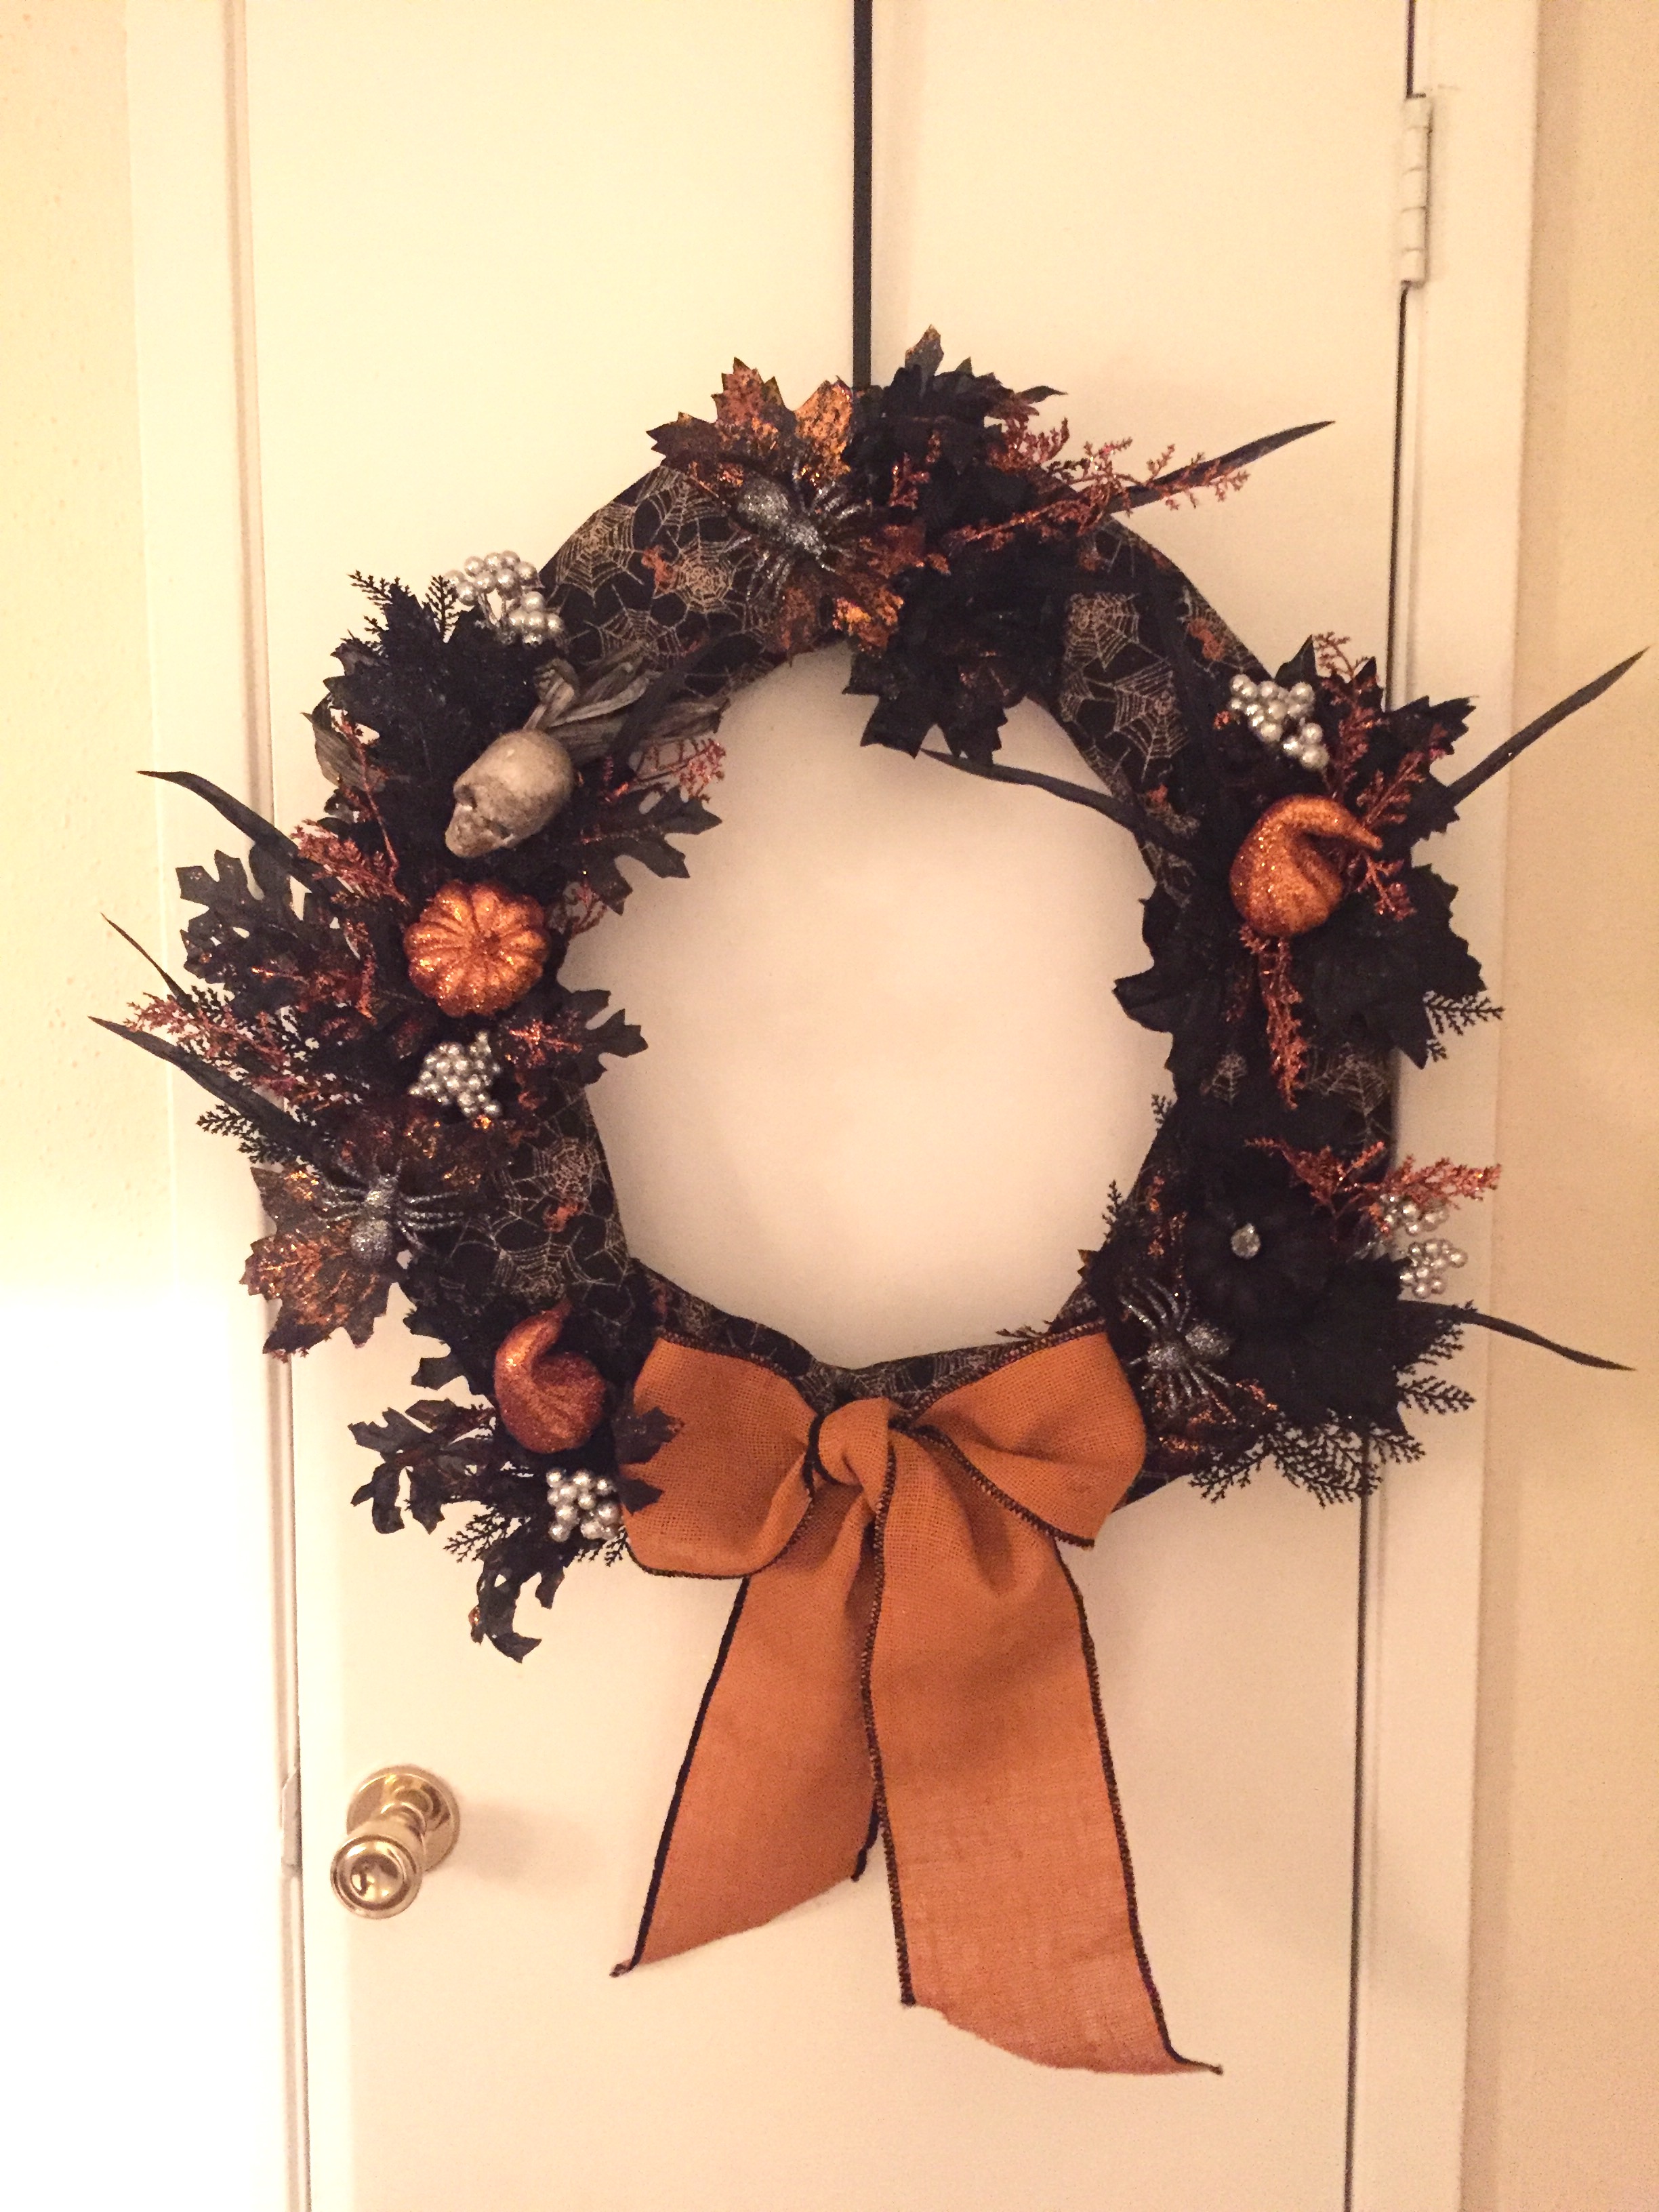


Finally, when you're done with this, you can bask in the glory of your accomplishment. You've made a beautiful wreath for Halloween. Hang it up, pour a glass of wine (if you haven't already), and enjoy cleaning up the glitter everywhere...
Good luck!! If you enjoyed this post please share it with your DIY crafting friends!
XOXO
