A Step By Step Guide to Making a Vision Board
Happy Wednesday everyone! Its been a while since I've shared a crafting - DIY project, even though it is something I love to do. I guess my craftiness took a back seat for a while as life took the wheel and I've sat on sharing this project for almost a year now. I say that because not only have I had the pictures ready to share, but I also have been blogging for almost a full year! WHOAH. Where has the time gone?
One of the easiest projects I have ever "made" was these vision boards for two little ladies. The idea of a vision board is that you add pictures to it to see your vision in full, sort of like a Pinterest board actually only without internet. ;) People use vision boards to gather ideas and to have a visual goal or focus that they can see in front of them daily. It can be used for motivation. It can be used for planning. It can be used to help you design a room or house. It can be used for anything!
The reason a vision board is useful, and somewhat important, is that it provides you with a visual goal or idea you are working on on a daily basis. As you see items to add to the vision board, your clear vision and goal continues to grow.
Example 1: If it is a fitness vision board, you will see images of weight loss, muscle gain, exercise ideas, and exercise motivation that you add to it. This will remind you every day that you see it that you are working towards your goal, keep your mind and temptations in check, and help you in your journey.
Example 2: If it is a life goal board such as what you'd like to do in retirement, then seeing images of traveling, golfing, a vacation home, etc. will help keep you motivated and striving to save money for retirement because you continue to see your end goal(s) in front of you.
Example 3: If it is a decorating vision board for a room or house you're decorating/redecorating, a vision board will help you visualize the key pieces of furniture, design patterns, and colors you want to use and how they look together as well as serves as a future shopping list. =)
Here's a couple of links to great questions to use when creating your vision board goals.
https://www.pinterest.com/pin/519110294535088101/
https://www.pinterest.com/pin/218987600612873895/
Of course, at the end of the day this is also a pretty pin-board for anything you want like to-do lists, grocery lists, reminders, notes, photos, or postcards simply because you want to save them. The best part about these are that they also make great gifts because you can personalize the frames, add names, colors, images or bows to the boards. Dinosaurs or cars around the frame would be fun for young boys. Ballerinas and bows would be cute for young girls. The sky is the limit! Now on to the quick instructions.
Supplies Needed:
1. Find a frame that you want to use for your vision board project. You can find used frames and mirrors at thrift stores that you can remove the paintings, pictures, or mirror from. They may need some sanding or painting, but that's part of the DIY fun. I bought these white frames from IKEA. They come in multiple size options.

2. Buy a cork foam board at your local craft store like Michael's or Hobby Lobby. Make sure to buy one big enough for your frame!

Note* You can get more hands on crafty if you want to by real cork, or even rolled cork paper to lay over a cushioned board and staple it to it, but you'll want to carefully measure the depth of your frame before getting into that realm.
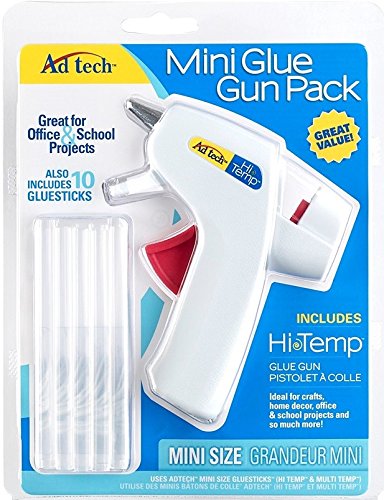
3. You'll also need a decent knife or pair of scissors. I purchased this rotary cutter and they works pretty great to cut into the foam board.


How to assemble the vision board:
1. Remove the back of the frame to take out the glass. Use the glass as a stencil to draw the cutting lines on the cork foam board. You will need to carefully and properly dispose of the glass when finished with it.
2. Carefully cut the cork form board along the lines so that it fits perfectly into your frame.
3. Add the cork foam board to the frame with the backing of the frame IF** it fits. The back of the frame did not fit well into my project so I left it off. Close the frame's prongs over the cork board and voila! Simple.

4. Decorate your heart away! Depending on what you want to do to the frames, you may want to decorate without the actual cork foam board in the frame. You can be super creative here.
I painted small wooden letters using inexpensive paint brushes and then Q-Tips to add dots and make puppy paw-prints.
5. Once the paint is fully try, you can glue your letters/numbers/images/bows onto the frame using wood craft glue or a hot glue gun, but remember to be careful with hot glue.

6. To hang your completed vision board you can attach the brass plates on the back (if your frame doesn't have it already) and hang using wire or a fun ribbon that will match the theme of the board. Just be careful that the ribbon can support the weight of the frame.

7. Enjoy your final project or wrap it up as a gift! =)
I'm sorry for the grainy, old pictures. I made this project in 2014 - many moons ago before I truly considered taking quality photos for a non-existent, future blog. =) One final thing to note is that because this uses a foam board, you may have to replace it periodically if a lot of things are pinned onto it and switched out frequently. But, as you see that is easy-peasy.
I hope you enjoyed this DIY craft idea! If you did then please share it with your family and friends. Also, don't forget to subscribe below so that you don't miss out on any future posts.
You can view my previous DIY craft projects here.
XOXO
